Link for all Steps : 10 Steps to Deploy NSX-T
In this article, we are going to explain all steps to Deploy NSX-T Manager & Add Compute Manager,
I would also recommend referring the VMware Product Interoperability Matrices (custom link here) to make sure your existing product versions are supported with the NSX-T version you are deploying.
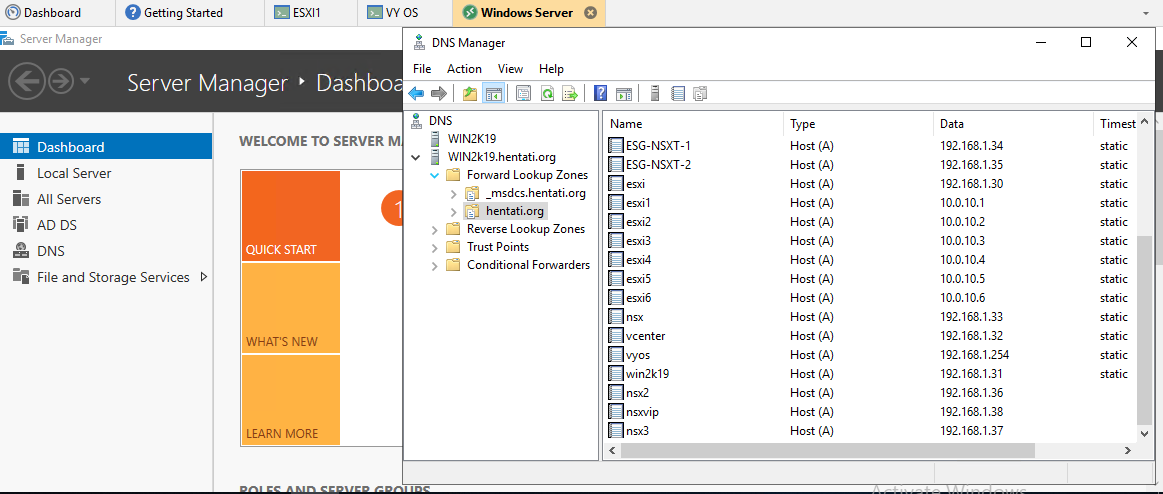
Firstly, create all records in your DNS server for the three NSX-T Manager nodes we will be deploying and one for the virtual IP. I have created the following, relevant to my environment:
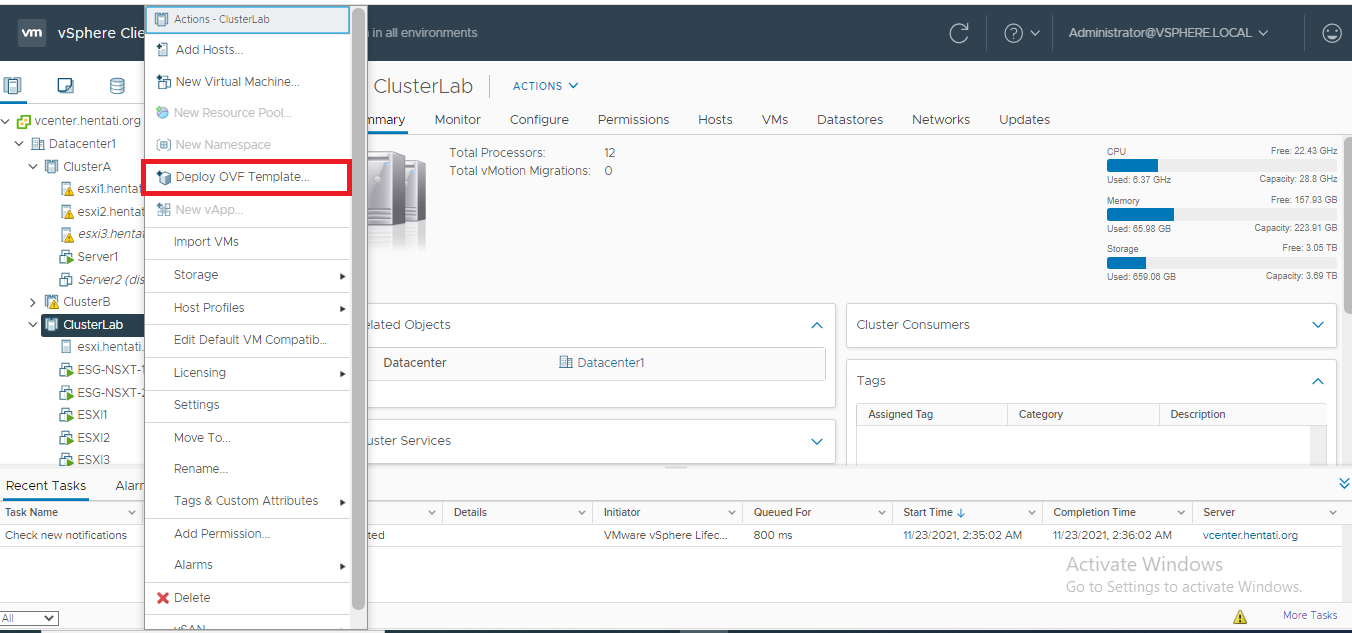
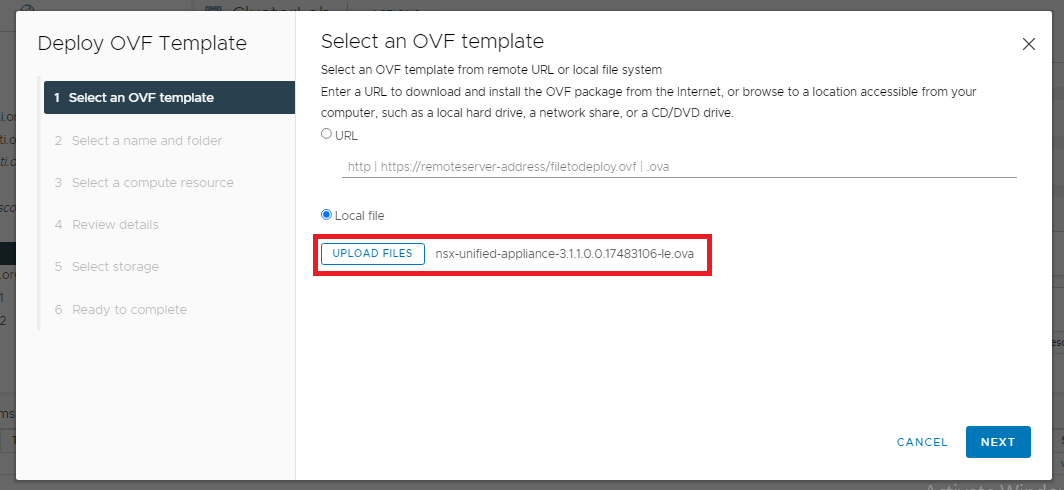
2. Either specify the URL or choose the NSX-T Manager’s ova file, and click “Next”:
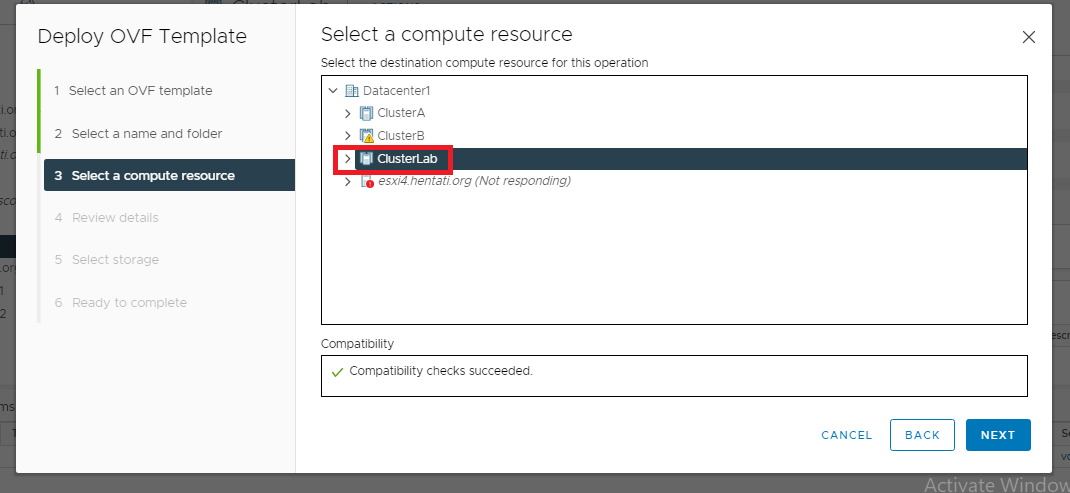
4. Select the compute resource i.e. the cluster, resource pool or the host, check compatibility has succeeded and then click “Next”:
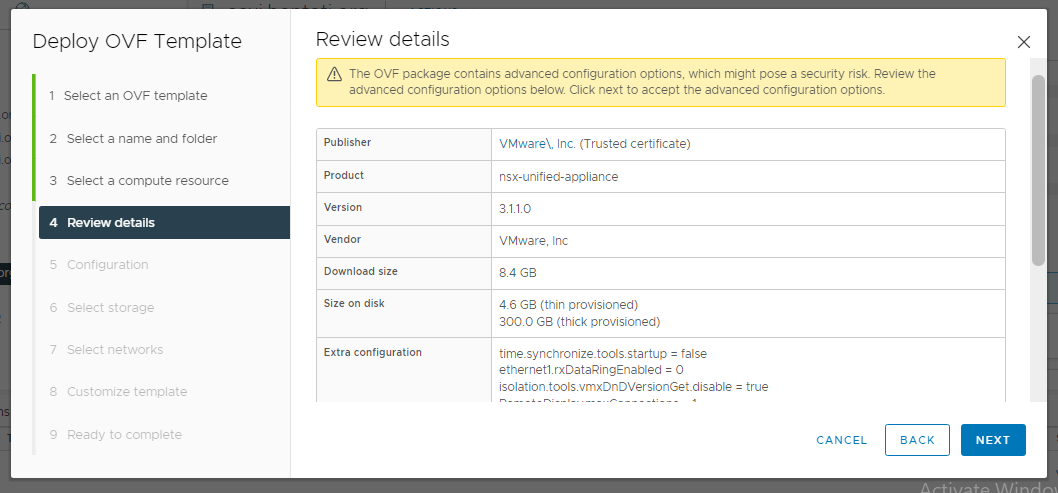
5. Review Details, and click “Next”:
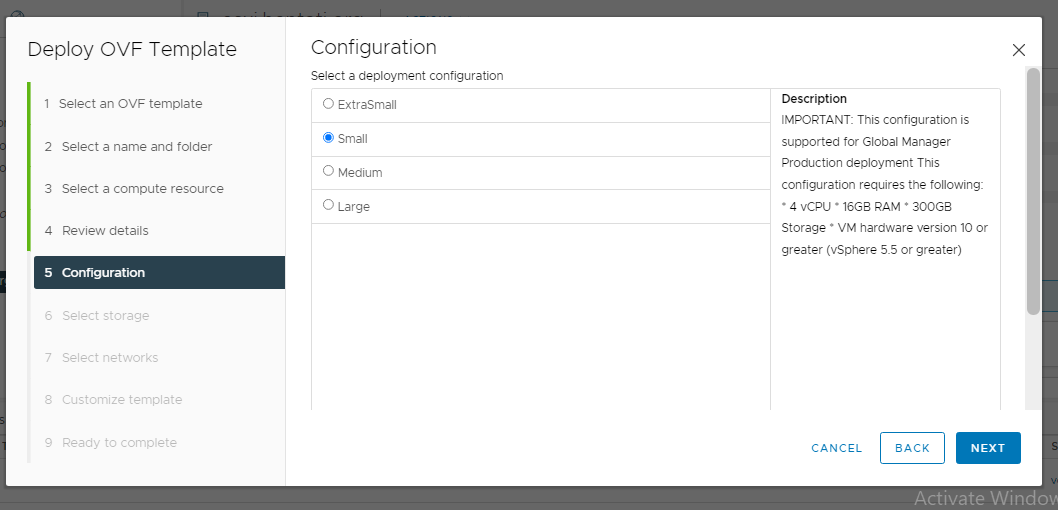
6. Select the deployment configuration size as appropriate and click Next:
Note: For production only Small, medium and large size are supported,
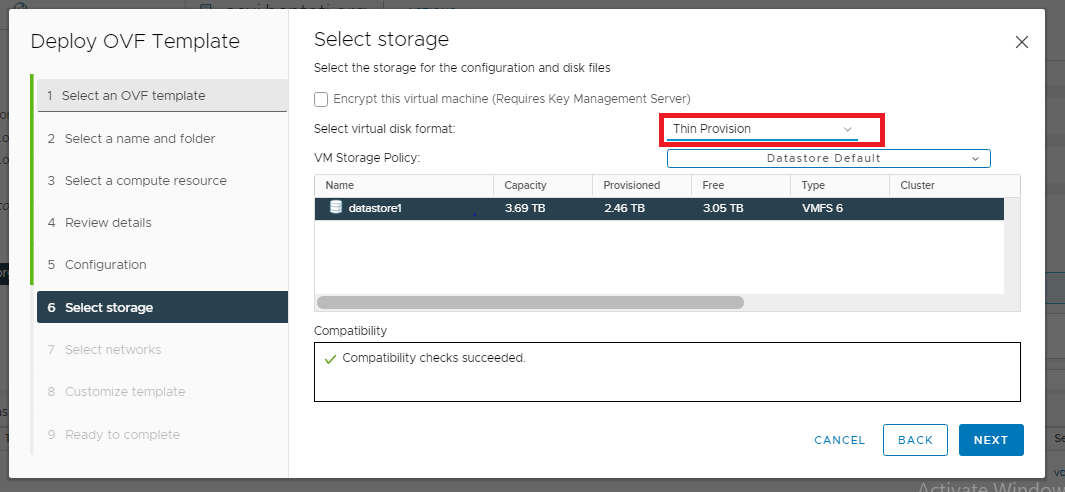
7. Select the datastore and appropriate disk format and storage policy. After the compatibility checks are succeeded, click Next:
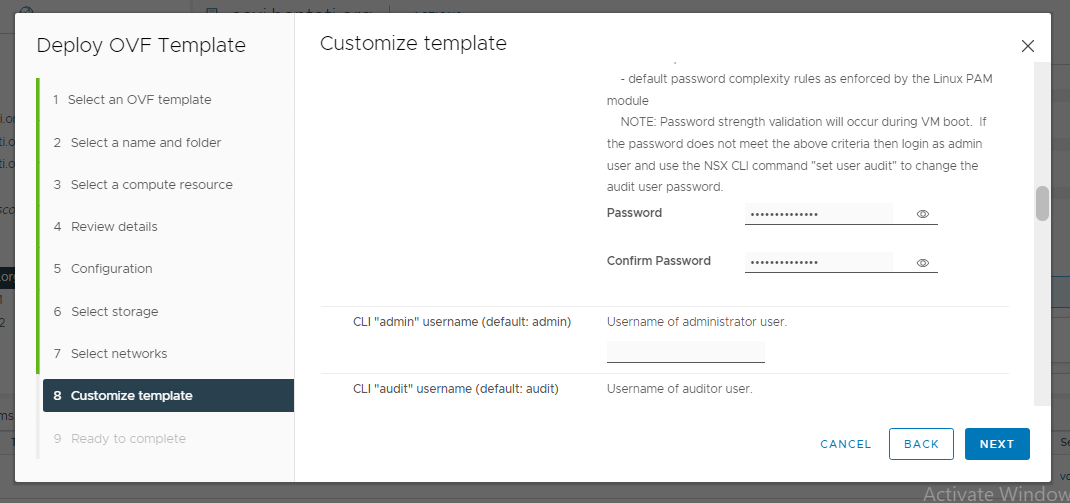
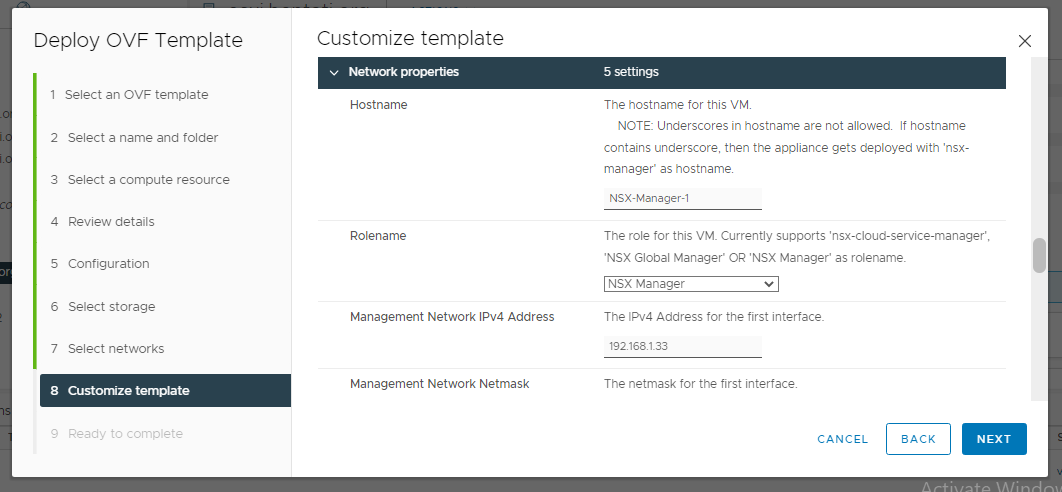
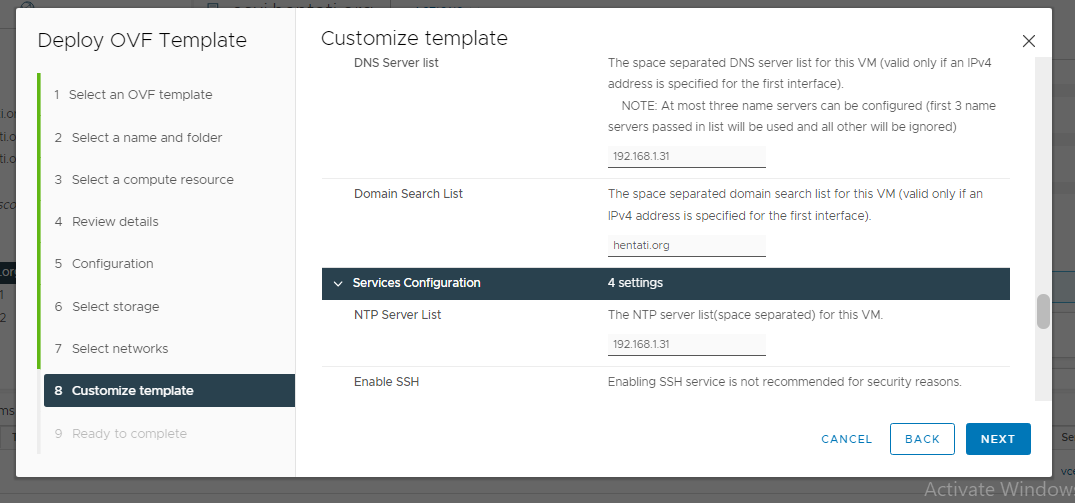
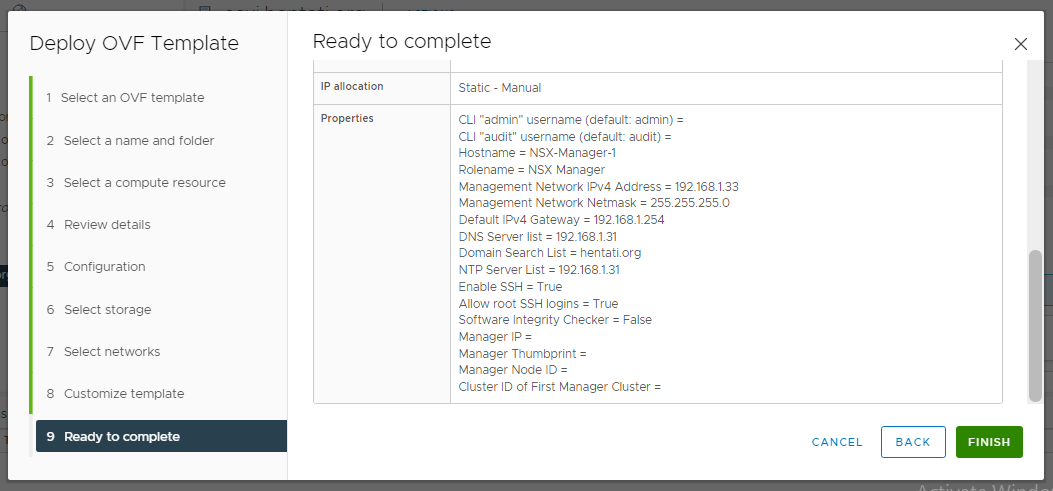
11. Specify the DNS details, NTP and whether you would require SSH to be enabled on the NSX-T Manager, click Next:
After all other services have started successfully, type “exit” command to logout.
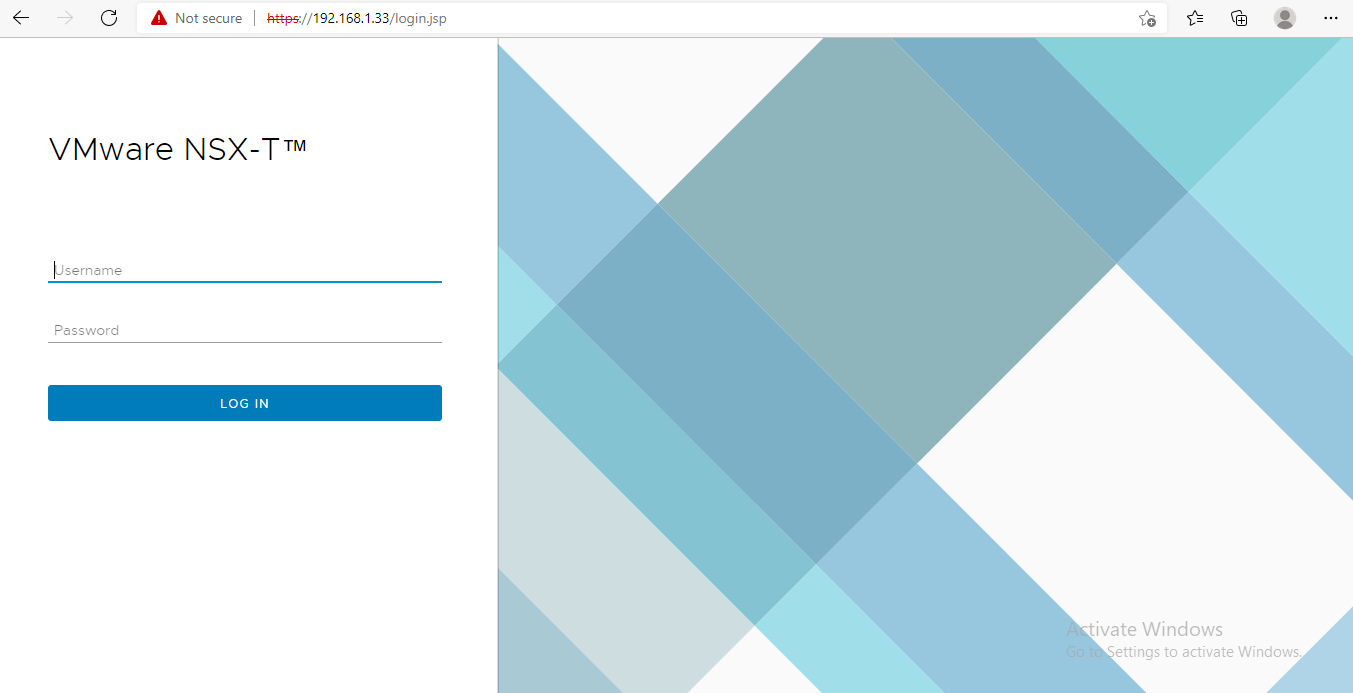
You should now be able to visit the NSX-T Manager UI login page via the URL “https://<FQDN or IP>”
This concludes this step of deploying the first node of NSX-T manager successfully.
A compute manager in this case is a VMware vCenter Server. It hosts centralised application that manages multiple ESXi Hosts and VMs from a single glass of pane.
As the vCenter holds all the information centrally available, NSX-T Data Center polls all the compute managers to find out the changes, such as the addition or removal of hosts or VMs and updates its inventory accordingly.
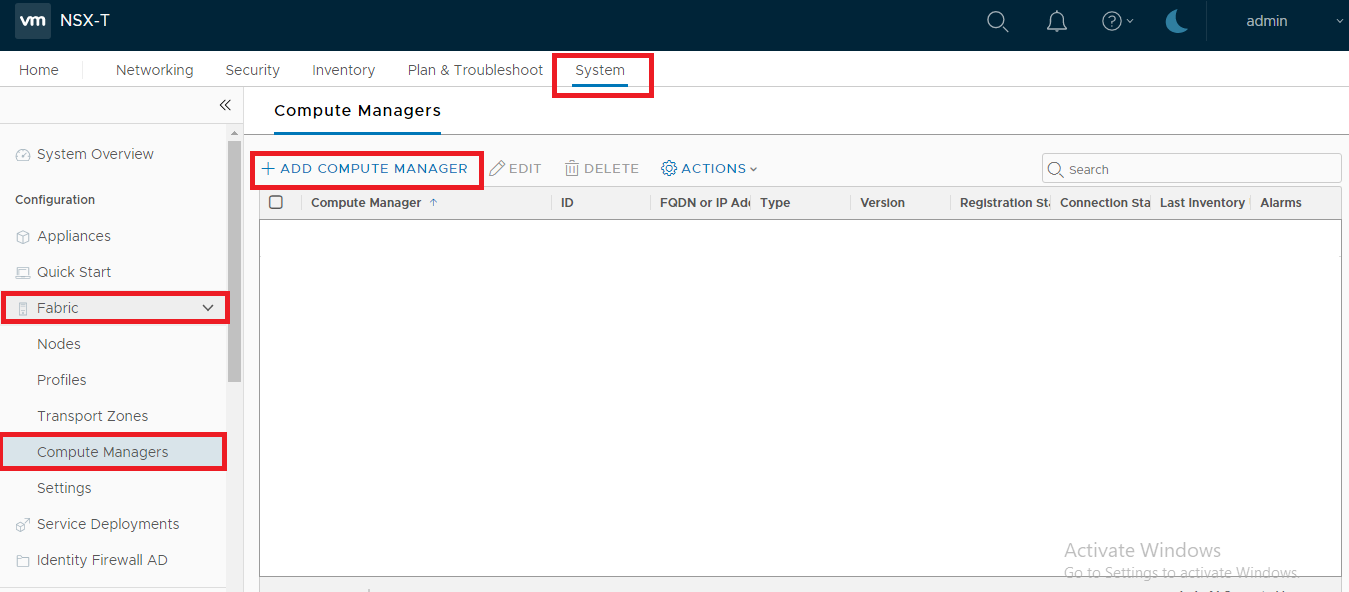
13. Logon to the NSX-T Manager UI https:// via admin credentials.
14. Click -> System -> Fabric -> Compute Managers -> Add:
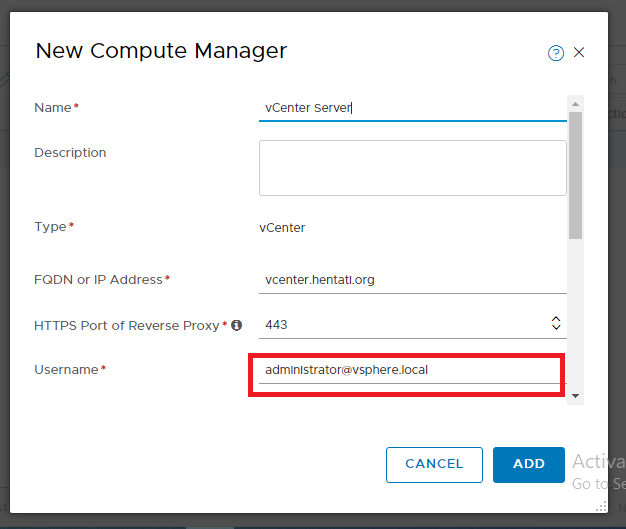
15. Specify the compute manager’s name, description, FQDN or IP, credentials and click the ADD button:
16. NSX-T Manager will show a message briefly that the “compute manager” was successfully created:
Add any other vCenter Servers in your environment (as necessary) and confirm the “Registration” and “Connection Status” as depicted in the image below:
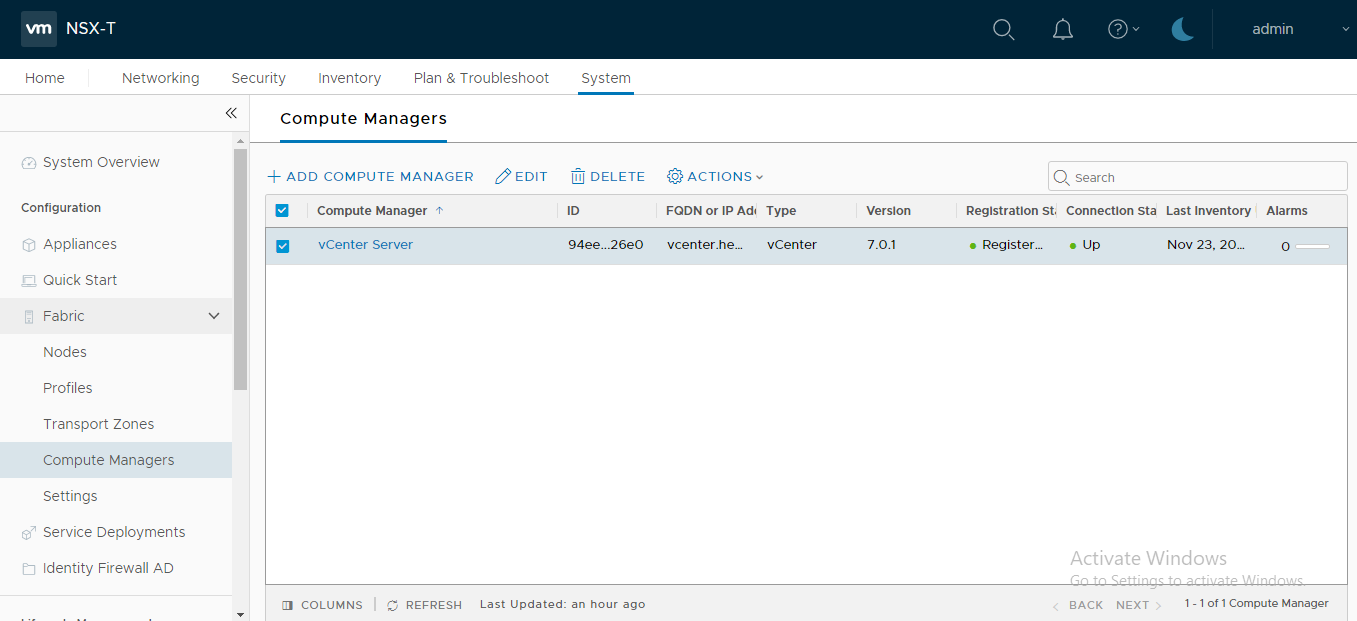
This concludes this step of adding a compute manager successfully.
(Next Step) Step 2 : Configure Management Cluster Virtual IP & Deploy Additional NSX-T Manager Nodes