Link for all Steps : 10 Steps to Deploy NSX-T
(Previous Step) Step 3 : Create IP Pools & Transport Zones
In this article, we will continue with the creation of uplink profile,
Uplink Profile :
An uplink profile defines the policies for the links from hypervisor hosts to the logical switches (segments) or from NSX Edge nodes to top-of-rack switches i.e. teaming policies, active/standby links, VLAN ID and the MTU setting.
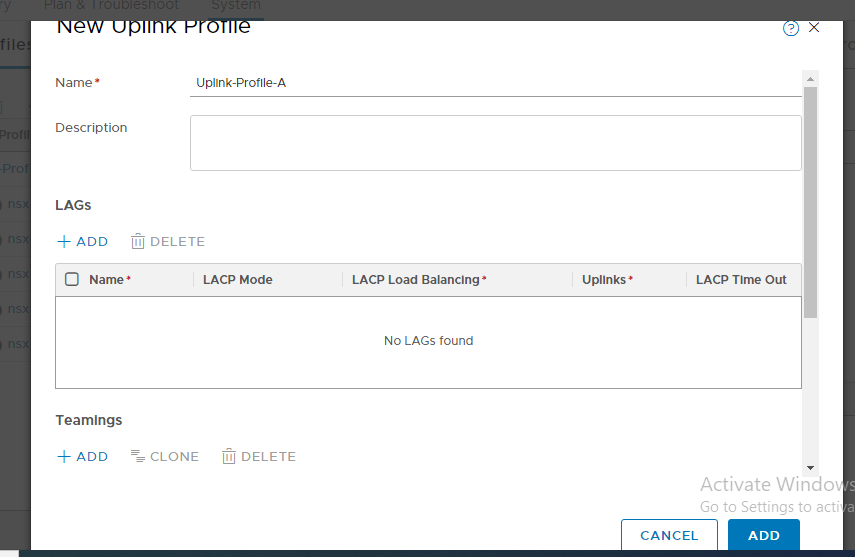
There are four pre-defined Uplink Profiles, which satisfies most use cases. This blog focuses on to create a bespoke uplink profile e.g. multi-tep uplink profile which will be utilised later in the series for the compute ESXi hosts.
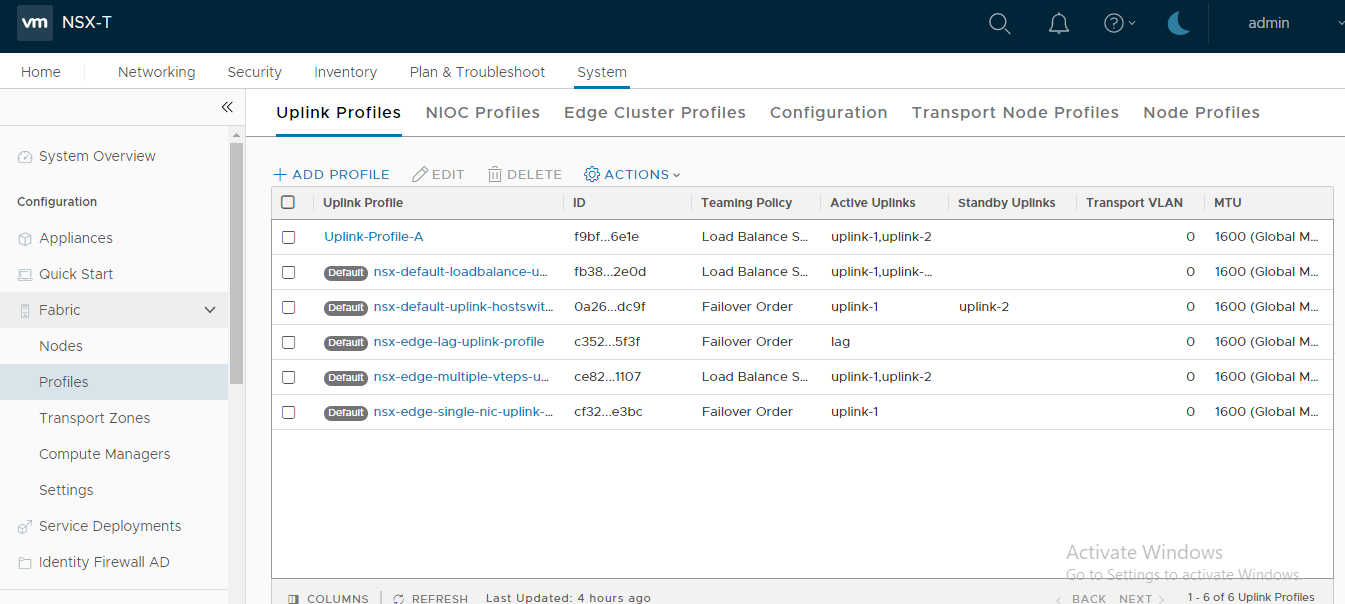
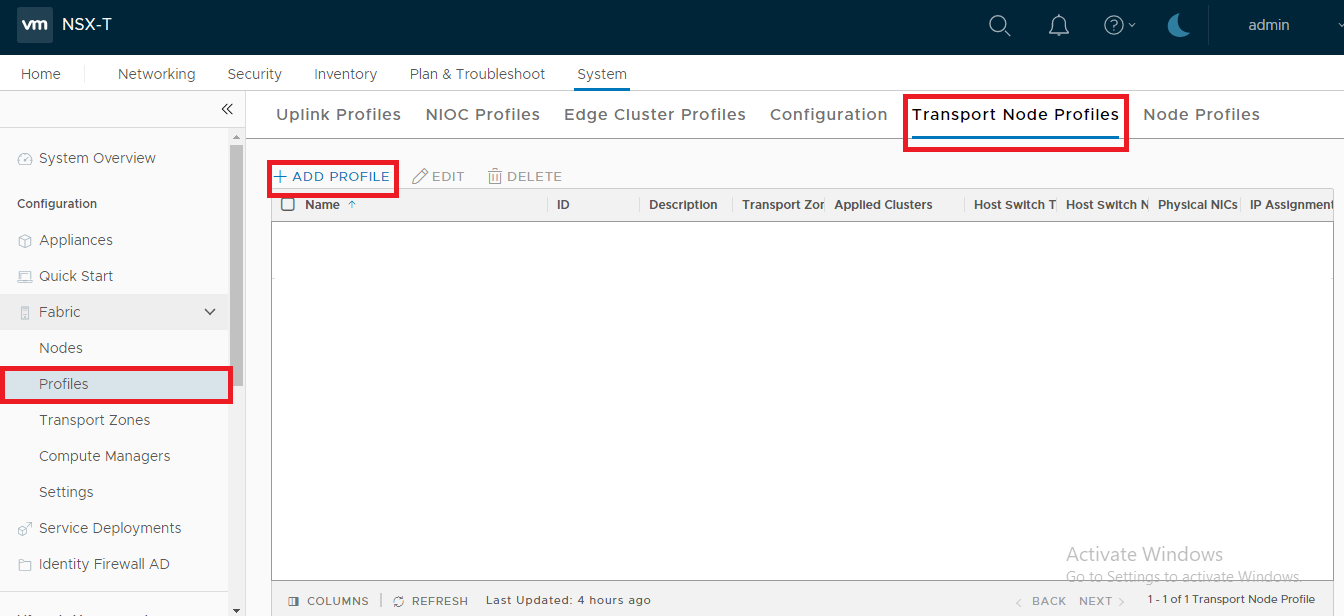
1. Click -> System ->Fabric -> Profiles -> Uplink Profiles -> Add Profile:
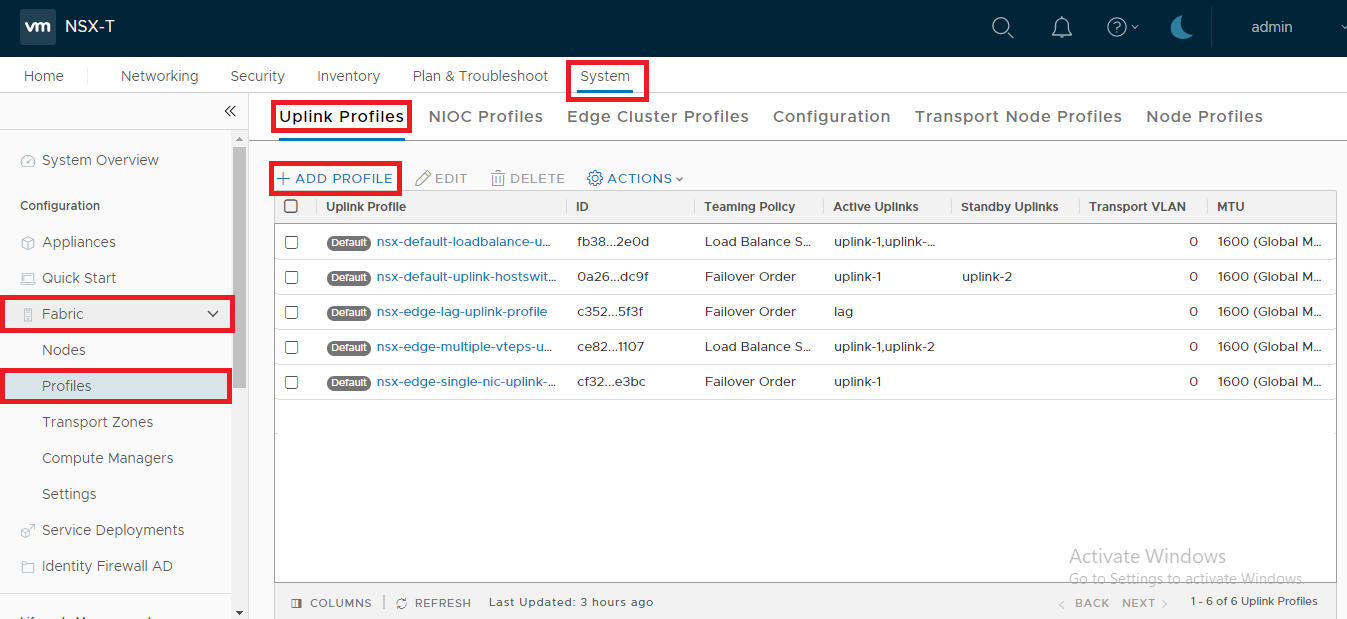
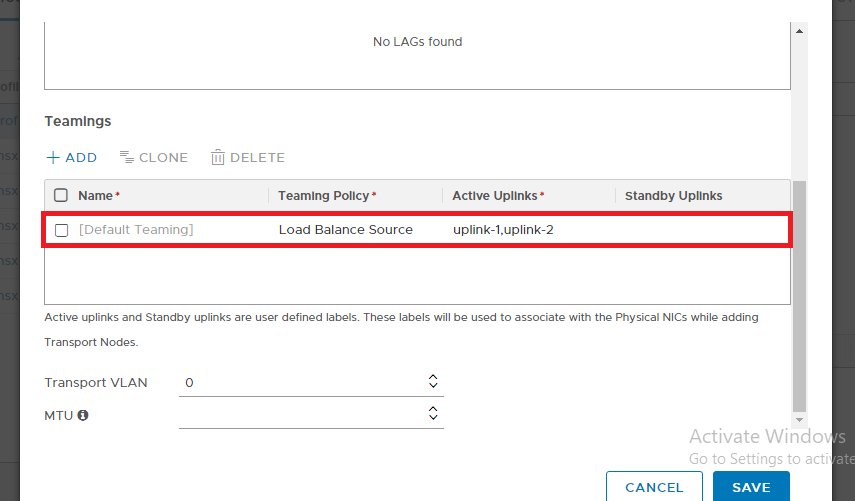
2. Specify the name, select Teaming Policy as Load balance source and both uplink-1,uplink-2 as “Active Uplinks”:
Transport Node Profile :
Transport node profile clubs an IP Pool, Transport Zone(s) and Uplink profile (discussed and created in the previous steps) in a single configuration profile that is applied to the Transport nodes e.g. hypervisors. It defines the network configuration of a transport node with N-VDS configuration, IP assignment and uplink to physical NIC mapping.
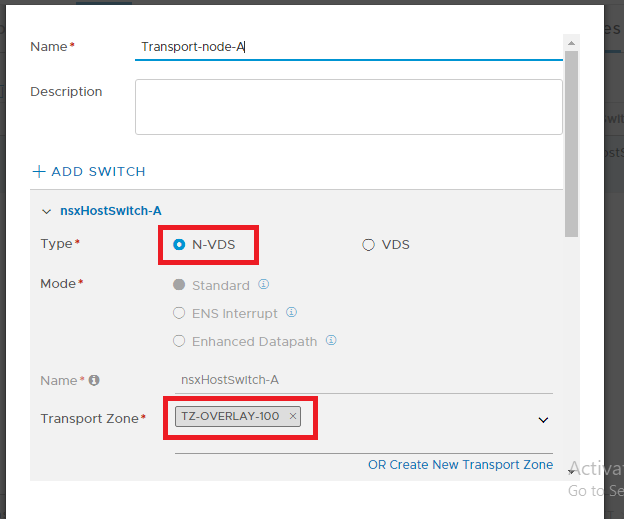
4. Specify the Name, select the “Overlay” Transport Zone created previously, Click N-VDS as shown in the screenshot below:
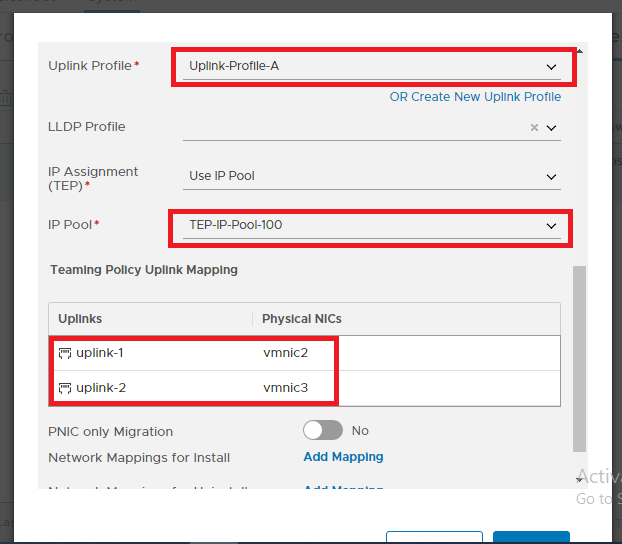
5. Select the N-VDS, the default NIOC Profile, Uplink profile created, LLDP Profile, IP Assignment , IP Pool also created , Select vmnic2 and vmnic3 (the physical NIC not in used), Click Add PNIC as shown in the screenshot below:
This concludes this step of creating a new Transport Node Profile successfully.

When a hypervisor host is prepared to function with NSX-T Data Center, the host is known as “Fabric Node” which carries the overlay traffic. All fabric nodes have NSX-T Data Center modules installed and are registered with the NSX-T Data Center management plane.
For a hypervisor host or a bare metal server to be part of the NSX-T Data Center overlay, it must first be added to the NSX-T Data Center fabric.
6. System -> Fabric -> Nodes -> Host Transport Nodes -> Select the Site A’s vCenter Server, as shown in the screenshot below
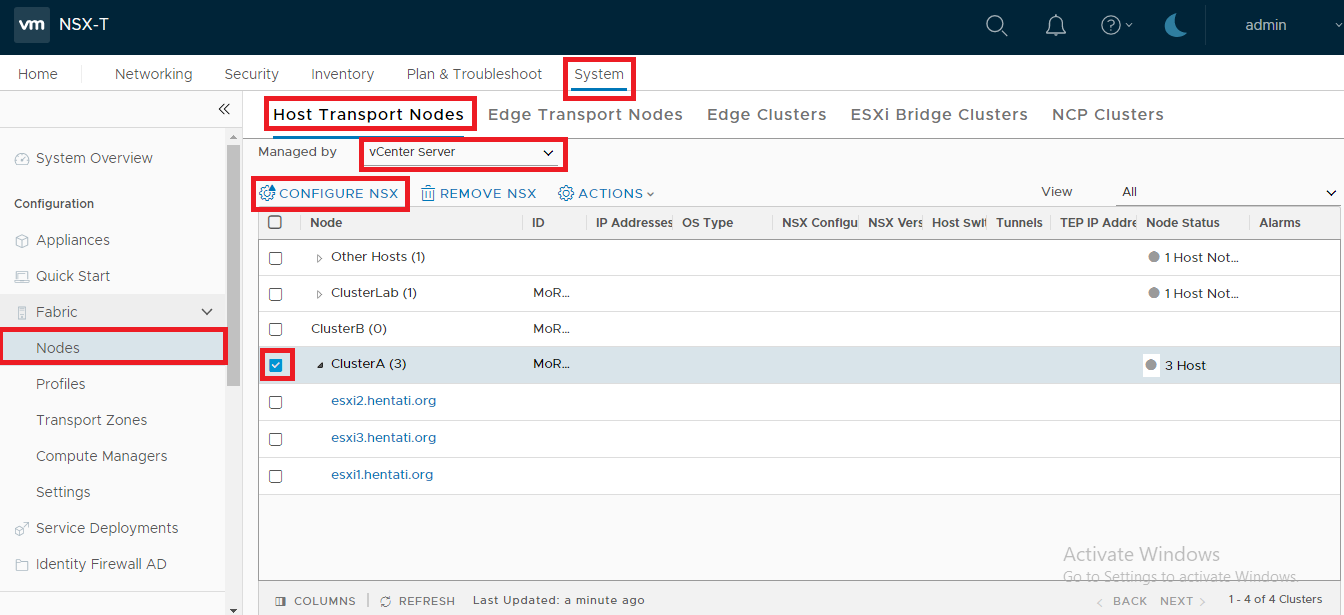
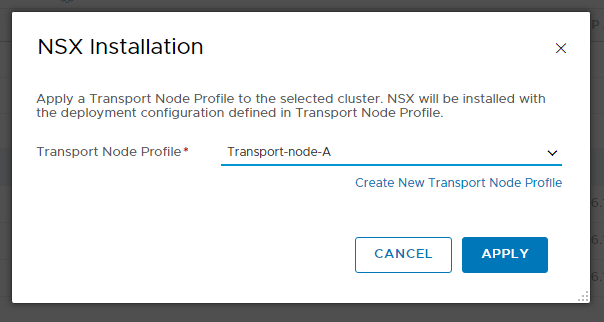
8. Select Transport-node-A as Deployment Profile -> Click Save as shown in the screenshot below:
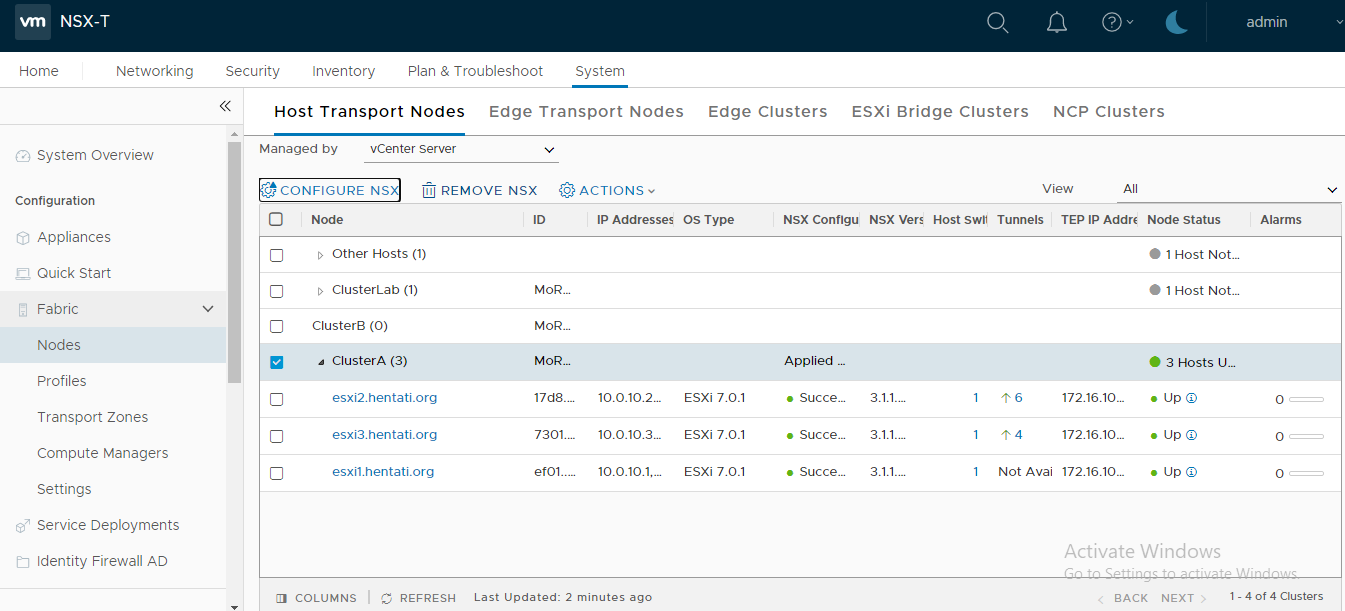
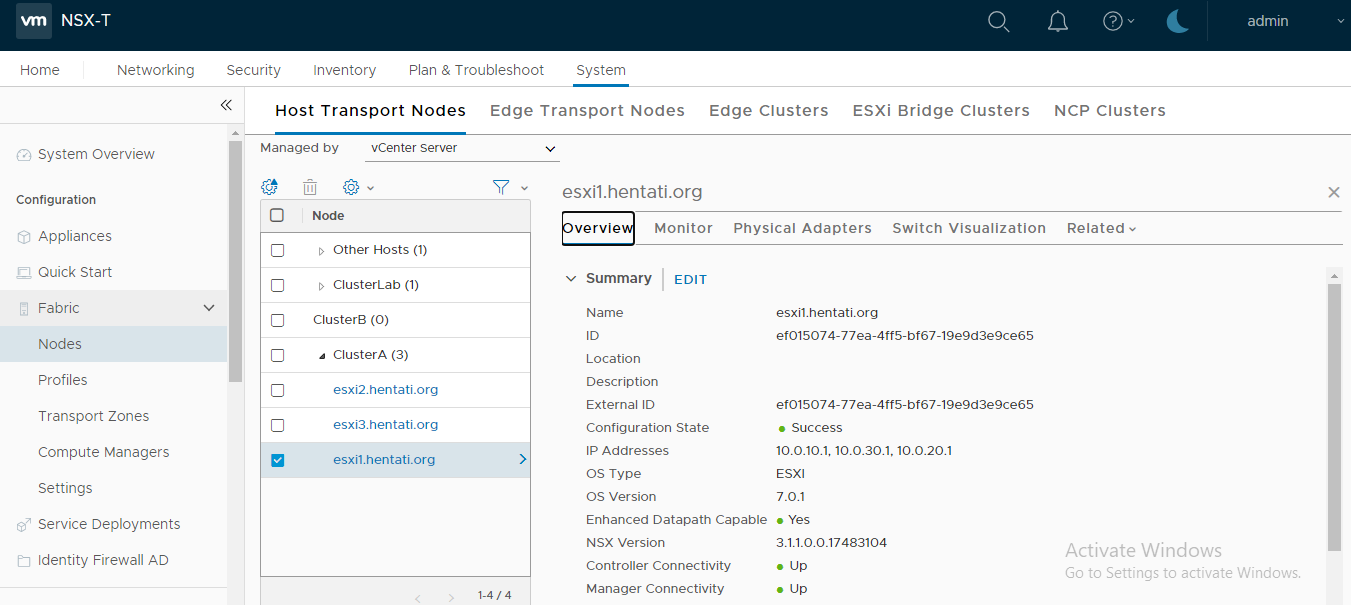
To verify configuration, we can check on overview:
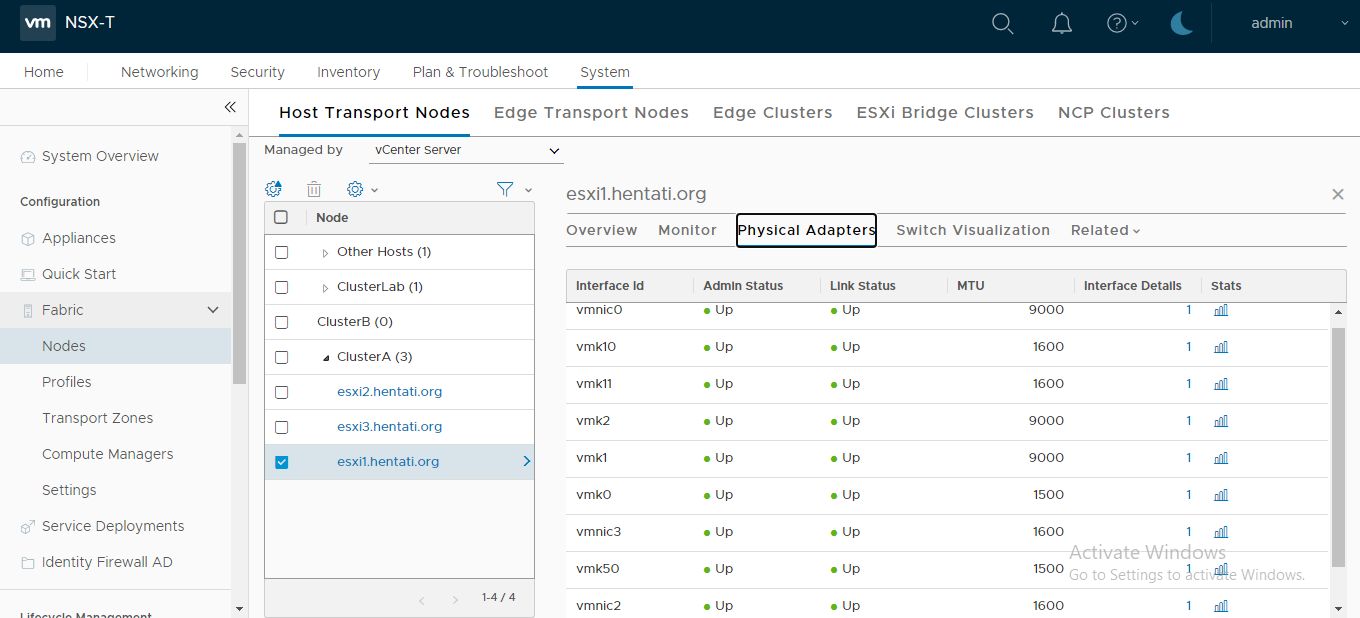
Also by Physical Adapters
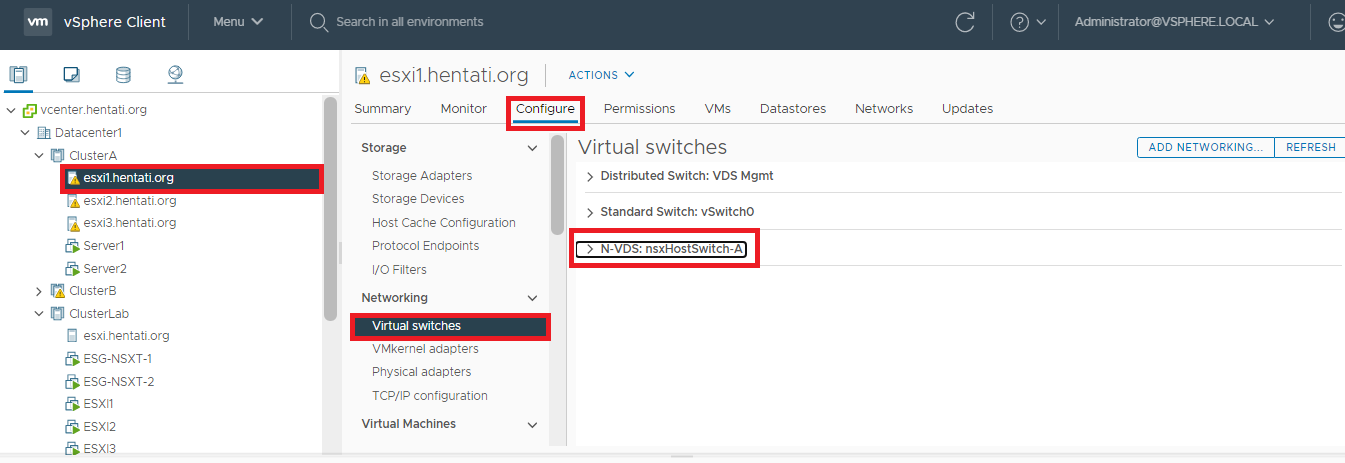
To visualize the N-VDS from vCenter Server – Logon to the vCenter -> Click “Hosts and Clusters” -> Select Host -> Click Configure -> Expand Networking -> Click Virtual switches:
The TEP IPs can also be identified by logging on to the esxi host and running the command below:
esxcli network ip interface ipv4 get
Run the following command to perform a ping test using the TEP interface:
vmkping ++netstack=vxlan 172.16.100.X
Note: Even though the overlay encapsulation used in NSX-T is GENEVE, the esxi command is still the same using the stack vxlan.
This concludes this step of configuring Host Transport Node successfully.
(Next Step) Step 5 : Configure Edge Transport Node, Deploy NSX-T Edge VM & Create NSX Edge Cluster
Pingback: advice for first time cialis user 20 mg