Link for all Steps : 10 Steps to Deploy NSX-T
(Previous Step) Step 1 : Deploy NSX-T Manager & Add Compute Manager
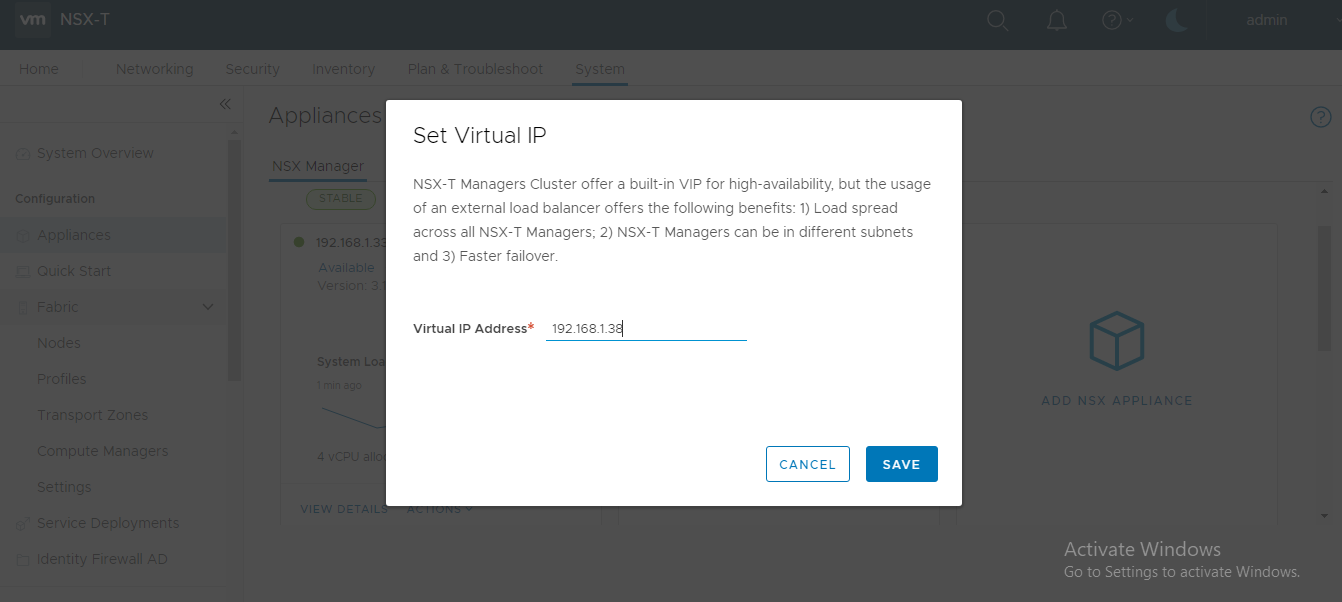
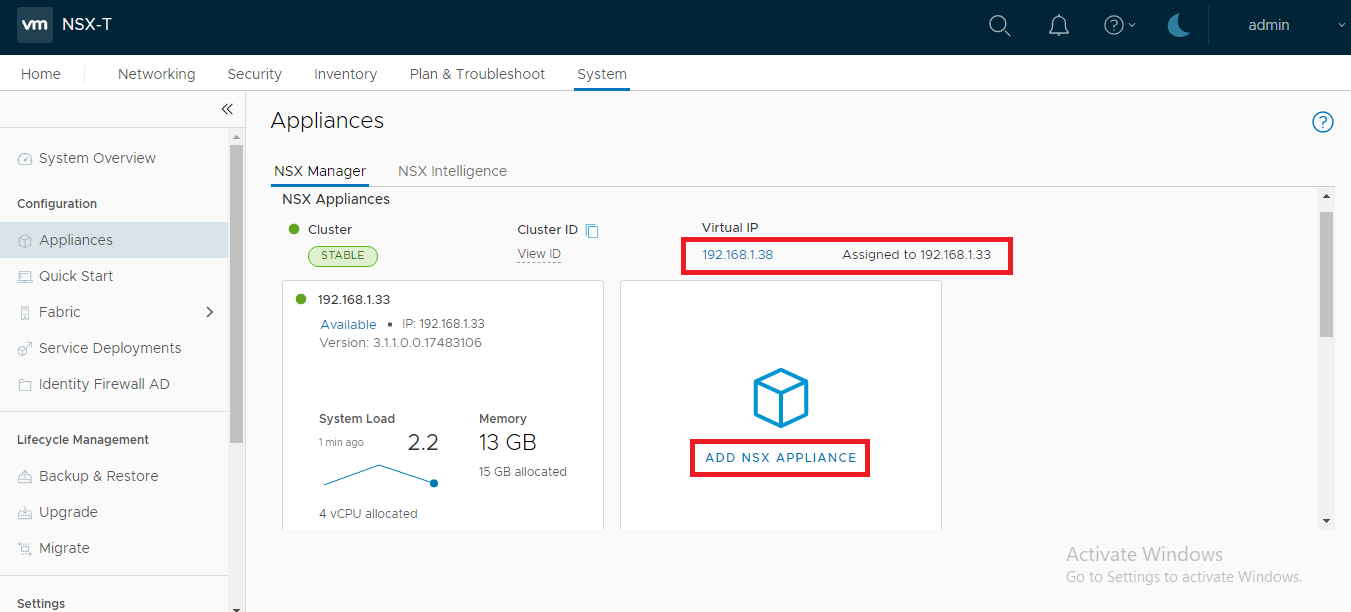
We are now going to focus on configuring the internal “Virtual IP” to provide fault tolerance and high availability to the NSX-T manager nodes.
- The failover of VIP to a new leader node might take a few minutes to become operational.
- The users must re-authenticate so that the API requests are targeted to the new leader node.
- The VIP does not serve as a load-balancer.
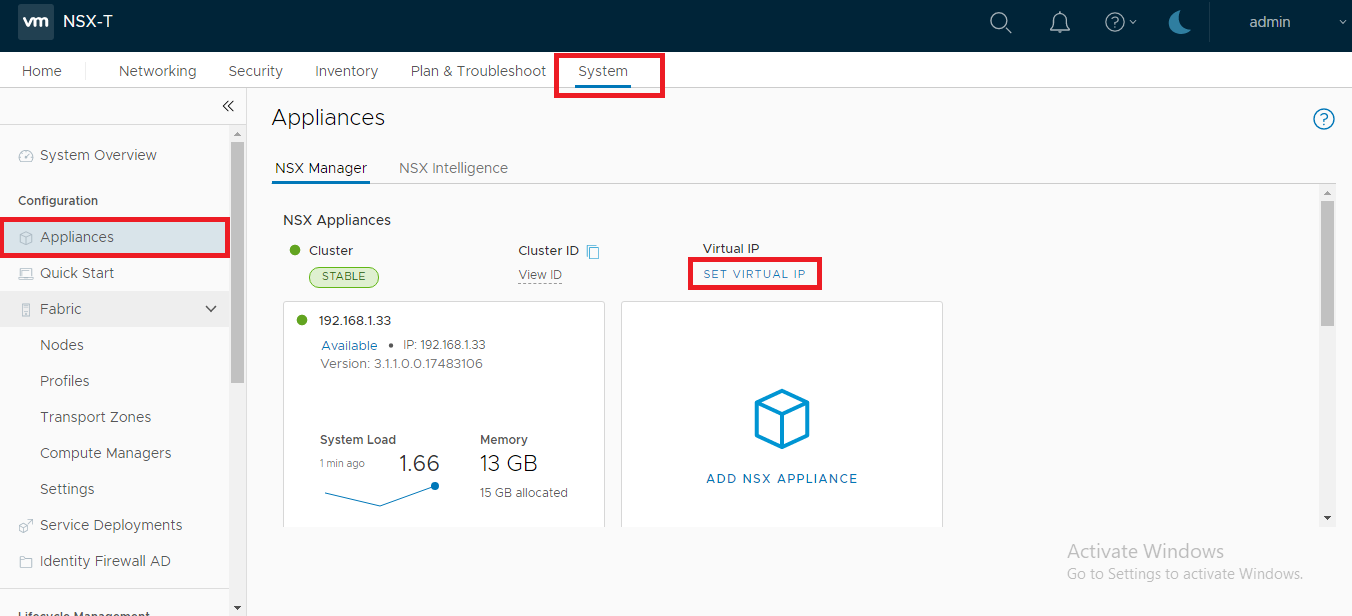
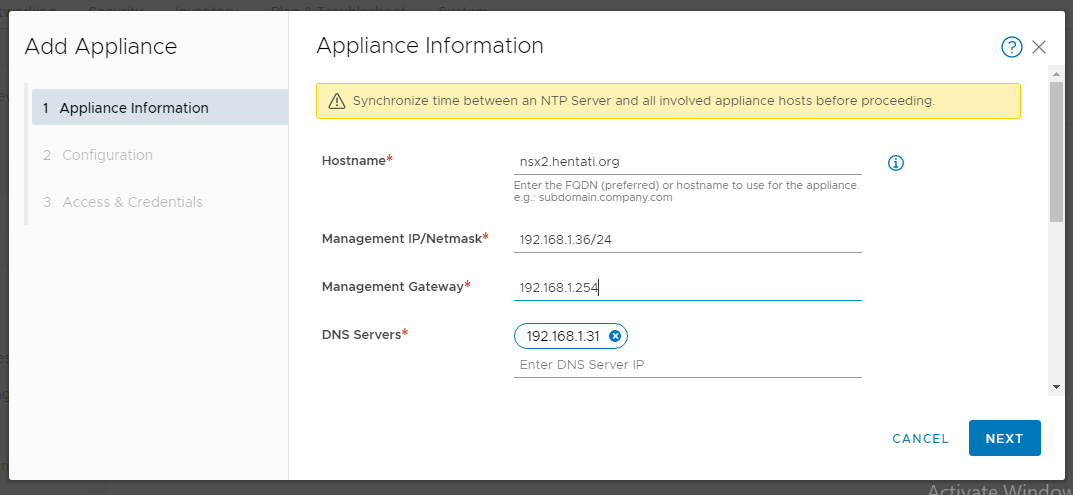
1. Click System -> Appliances -> SET Virtual IP:
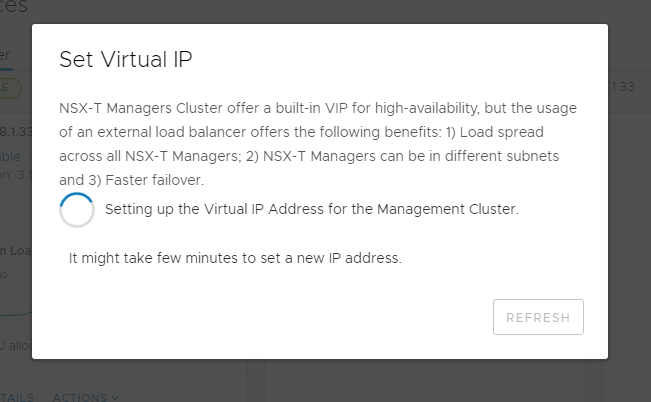
3. NSX-T Manager will take some time setup the VIP and will display the message as shown in the screenshot below:
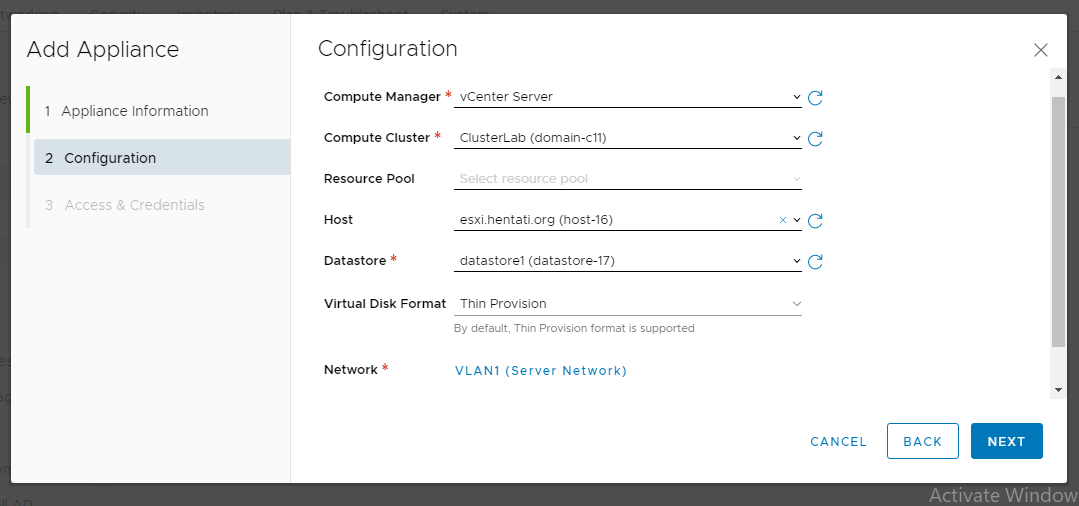
6. Enter the hostname,IP address, DNS, NTP and select the form factor:
8. Enable SSH (if required), enter the cli and root password:

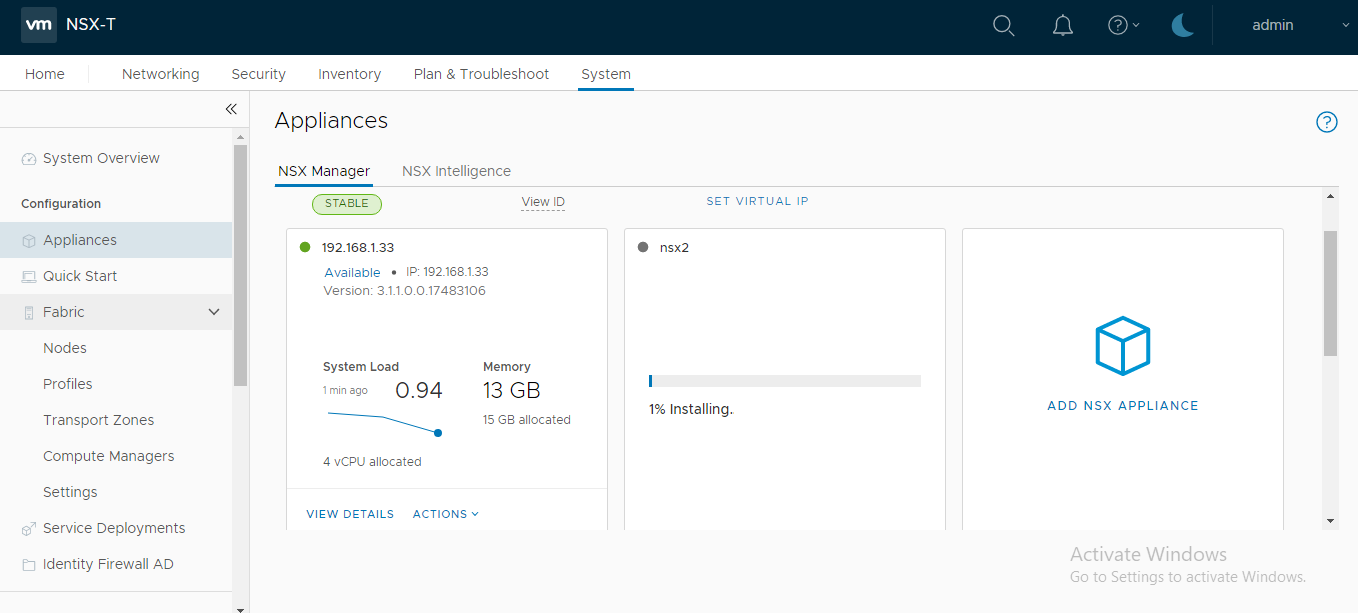
The status could now be monitored from the same screen, screenshot below showing deployment in progress:

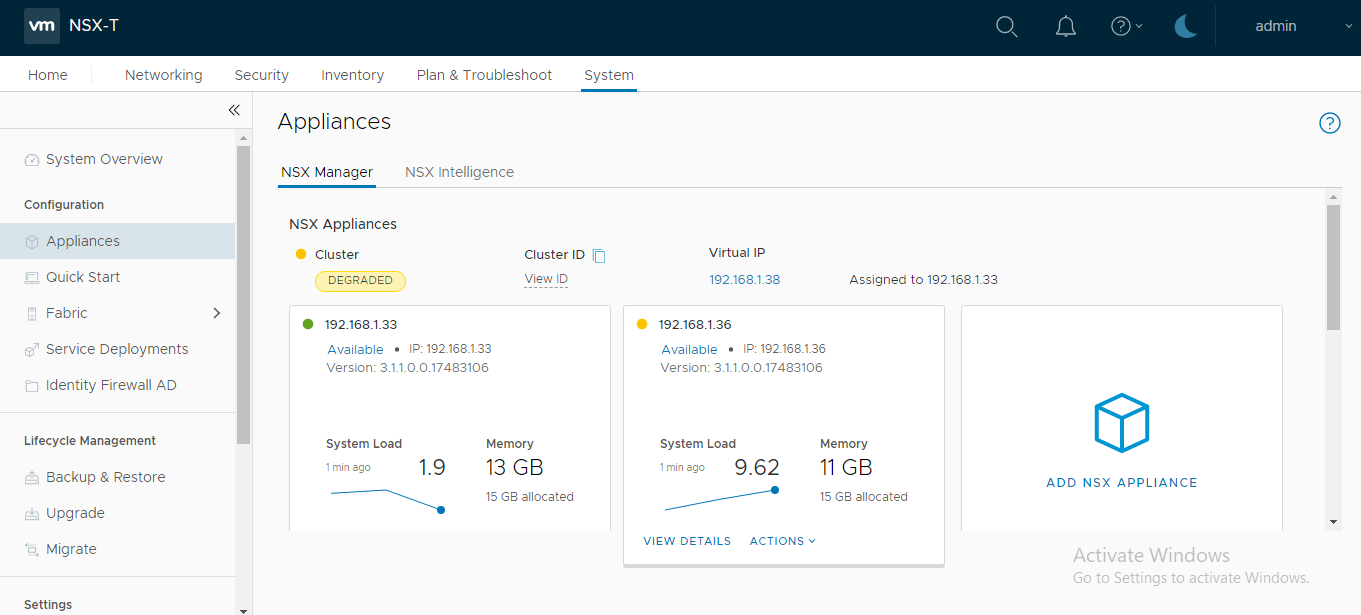
A successful deployment will show the “Management Cluster” as Stable, “Cluster Connectivity” as Up and “Repository Status” as Sync Complete, as shown in the screenshot below:
Note: VMware only supports a three node NSX-T Manager cluster, repeat the steps above for adding the third node.
This concludes this step of deploying additional NSX-T Manager nodes successfully.
(Next Step) Step 3 : Create IP Pools & Transport Zones